Redmine - Spent Time Installation
Spent Time Plugin Installation
Installation notes
Unpack the zip file to the plugins folder of Redmine. Starting from version 3.4.2, it requires db migration. So run the following command for db migration
When uninstalling the plugin, be sure to remove the db changes by running
Steps to Configure the Plugin
1. Give a Spent time permission to admin.
2. Now Company menu enabled in administrator menu
3. Click a Company Menu
4. Click New Company
5. Create a company
6. Successfully Update the company.
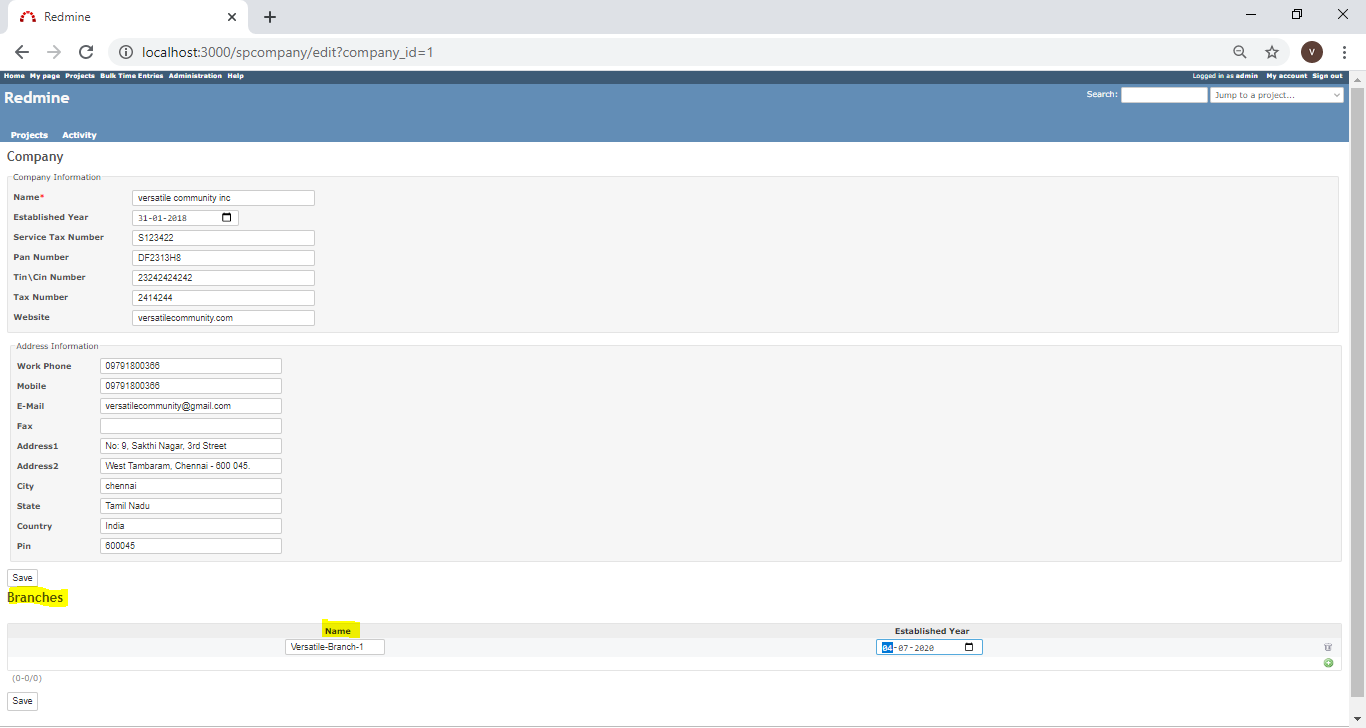
7. Edit the Company and Create a Branches
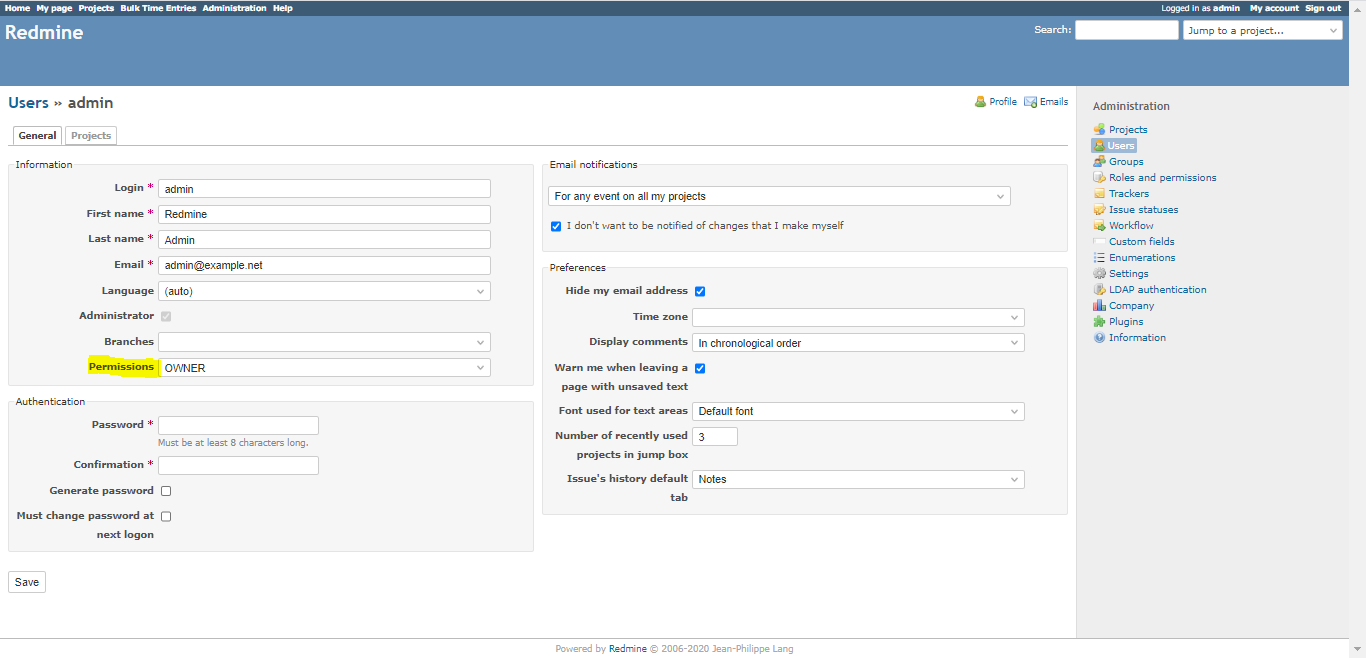
8. Create a user with branch and permissions
9. Create a Project and add the users
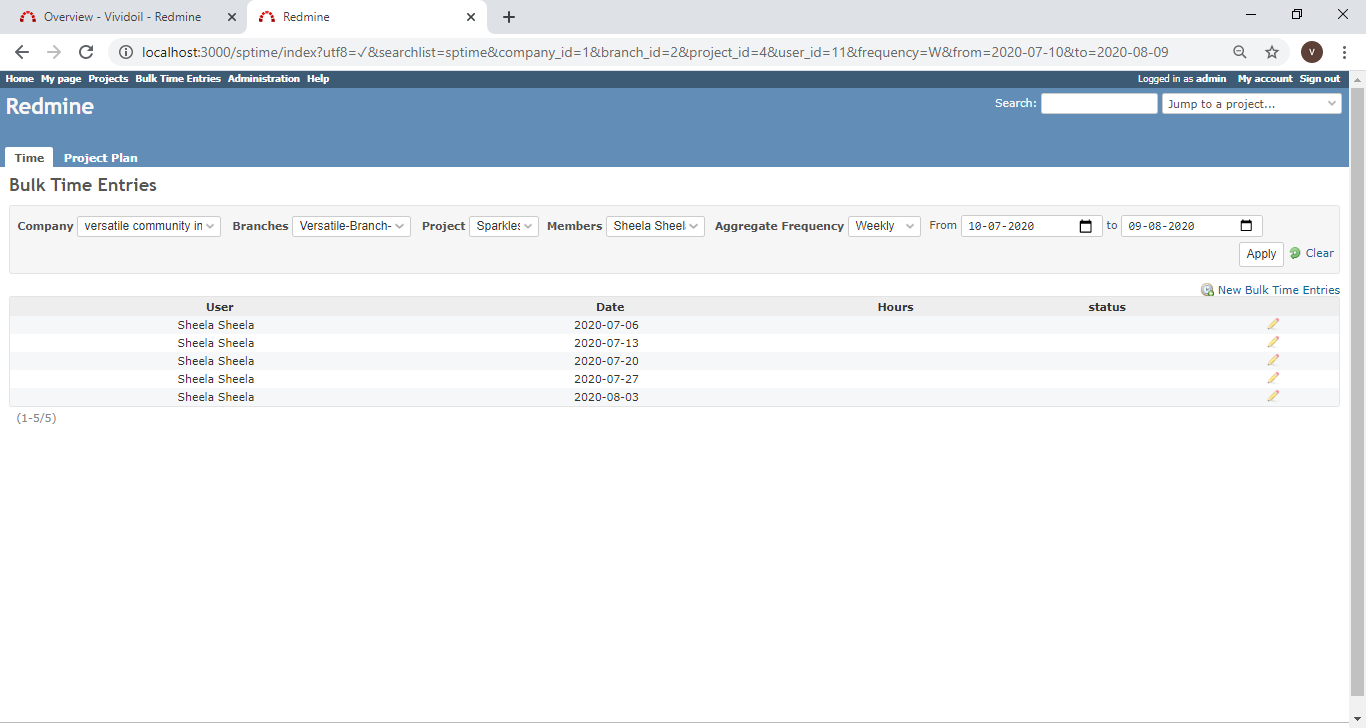
10. Click Bulk Time entries
11. Add or Edit Time entries
12 Project Plan
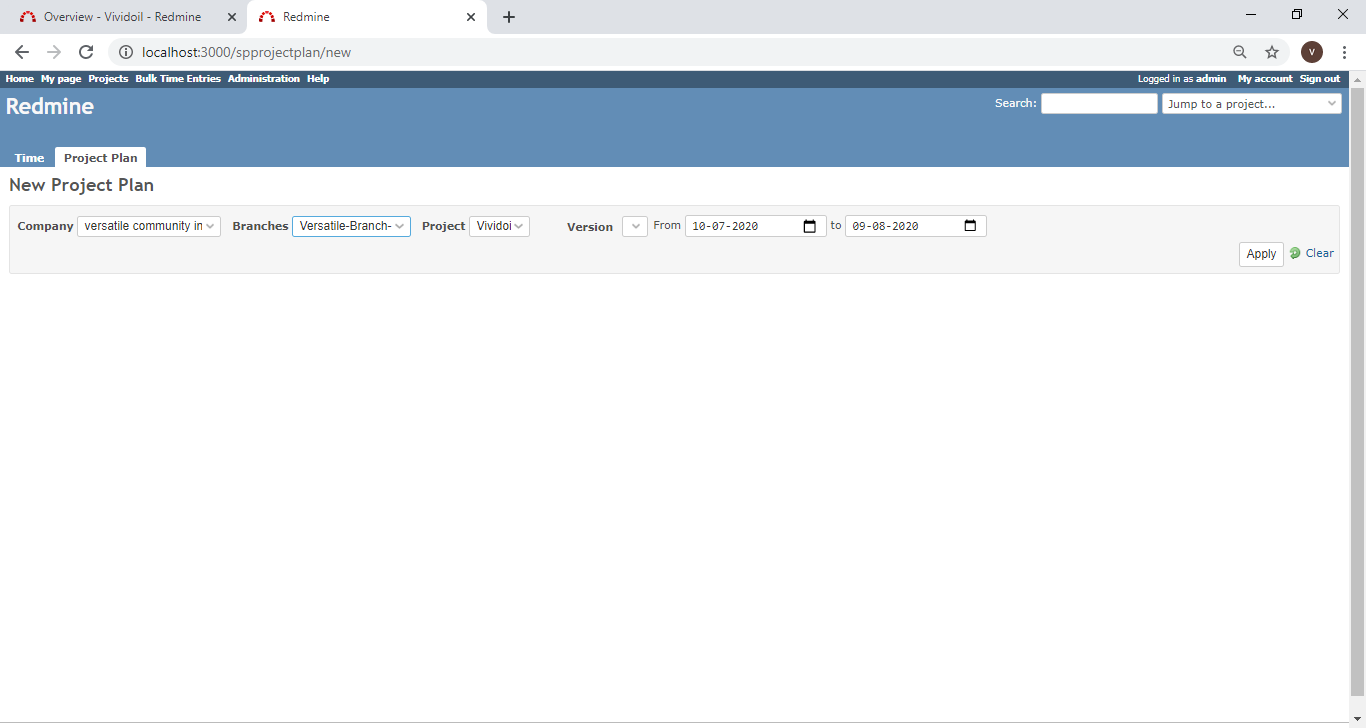
13. New Project Plan
14. Create a Project Plan
Steps with Images
1. Give a Spent time permission to admin.
2. Now Company menu enabled in administrator menu

3. Click a Company Menu
4. Click New Company

5. Create a company

6. Successfully Update the company.
7. Edit the Company and Create a Branches
8. Create a user with branch and permissions

9. Create a Project and add the users

10. Click Bulk Time entries
11. Add or Edit Time entries

12.Project Plan

13. New Project Plan
14. Create/Edit a Project Plan

Comments
Post a Comment